
My Webassembly 101 tutorial got ~50000 page views after hitting the front page of hacker news. I got a $12 USD S3 bill in June from Amazon. In this tutorial I will show you how to get a free CDN and HTTPS everywhere with Cloudflare.
This tutorial is written for an Heroku hosted Ghost blog but it should be pretty straightforward to use it for other hosting options.
What is a CDN and why would you need it ?
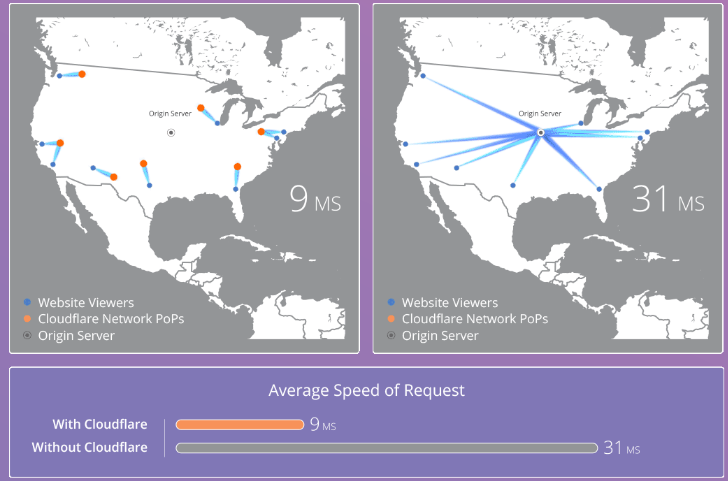
A content delivery network or content distribution network (CDN) is a geographically distributed network of proxy servers and their data centers. The goal is to distribute service spatially relative to end-users to provide high availability and high performance.
In short:
- Hosting costs reduction
- Better performance for end users
- Encrypted traffic for more security
Summary
- Initial mistakes
- Fix 1: setup Clouflare in front of your website
- Fix 2: update all articles with lower resolution images and CDN urls
- Fix 3: Free HTTPS
- Cached traffic results
- Conclusion, TLDR: 75% costs reduction
- Bonuses
Initial mistakes
- No CDN.
- Having hosted high resolution images on S3.
- No HTTPS, leading to lost referrers.
A Referrer header is not sent by browsers if [...] an unsecured HTTP request is used and the referring page was received with a secure protocol (HTTPS).
Errors 1 and 2 led to a 12$ bill for the month of June 2017, ~100+Gb of data transferred at $0.09/Gb.


Error 3 led to bad analytics because most referrers are not set.
Fix 1: setup Clouflare in front of your website
Cloudflare has a nice on-boarding process once you register for the free account.
Main steps are:
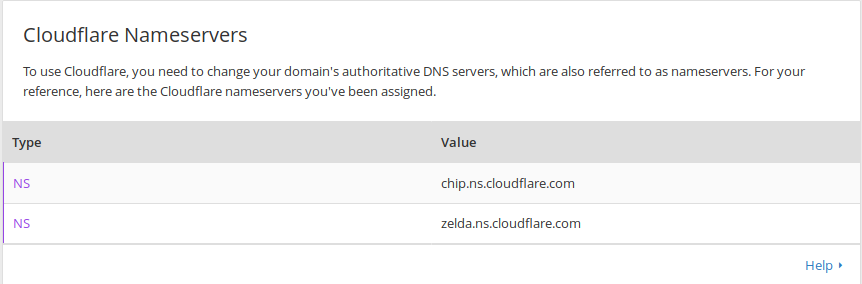
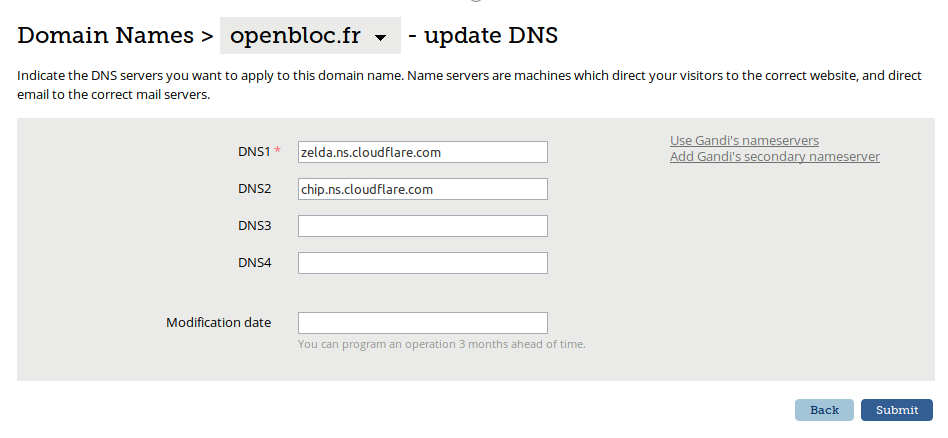
- Update the DNS server on you registrar with the ones Cloudflare gives you on the CDN tab:
On your registrar dashboard you just have to copy paste above urls:
- Setup an S3 bucket with a cdn compatible name:
cdn.example.com.s3.eu-central-1.amazonaws.comand replaceexample.comby your website's name. See the documentation for a more detailed explanation.
If your domain is "example.com" and you want to use the CNAME "files" you'll need to make sure the S3 bucket name is "files.example.com". Amazon requires that the CNAME match the bucket name.
- Create a cdn CNAME record for the above CDN bucket url.
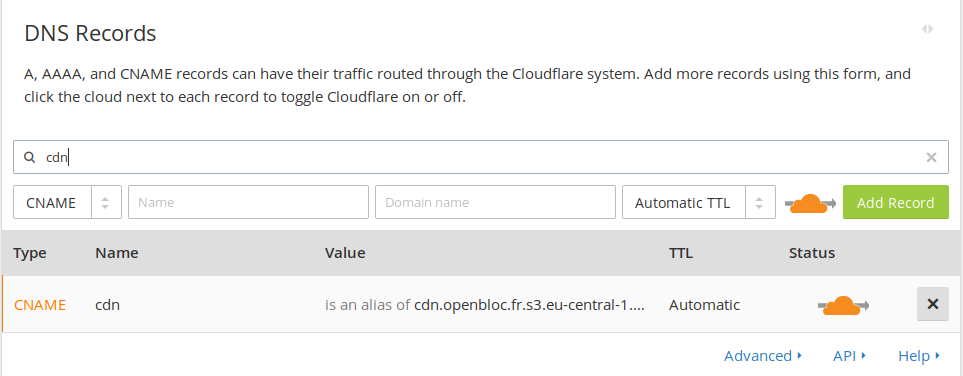
- After 24h the DNS have updated and I was able to access my S3 bucket content through
cdn.openbloc.fr.
Fix 2: update all articles with lower resolution images and CDN urls
Pretty straightforward as the title said. Do not store 4000x3000px images ! Use a lower resolution and compress the jpeg images as much as quality permits.
Fix 3: Free HTTPS
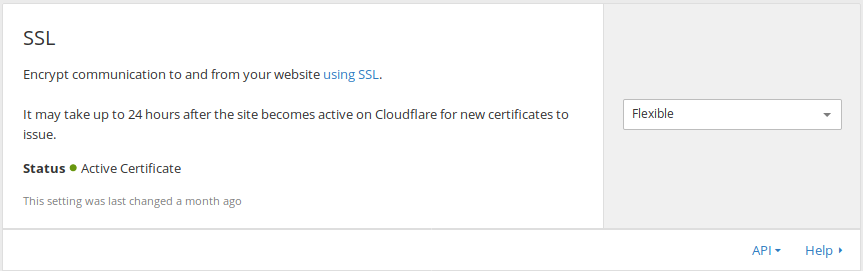
Cloudflare offers a nice service: Cloudflare one-click SSL.
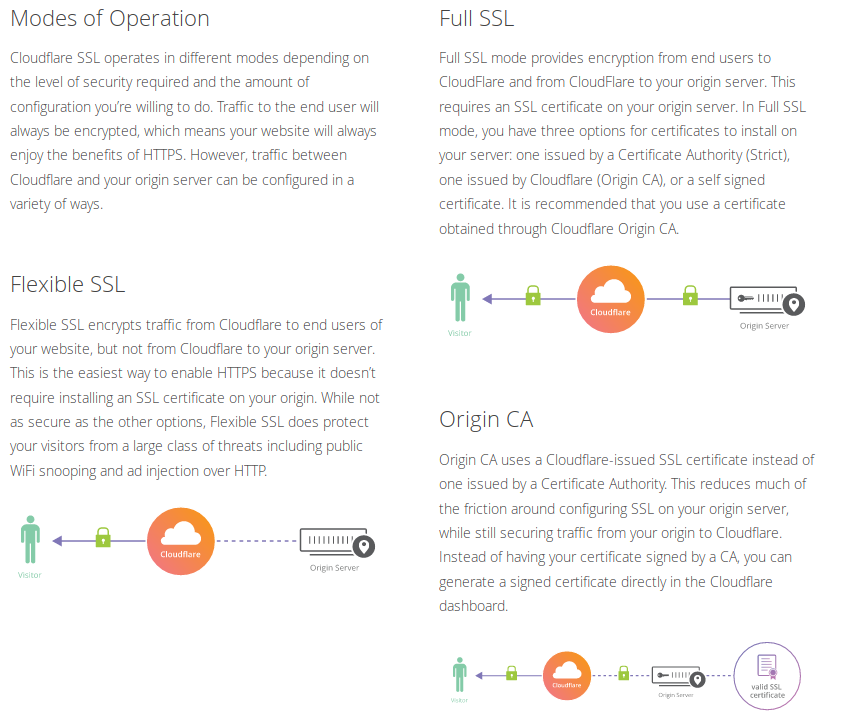
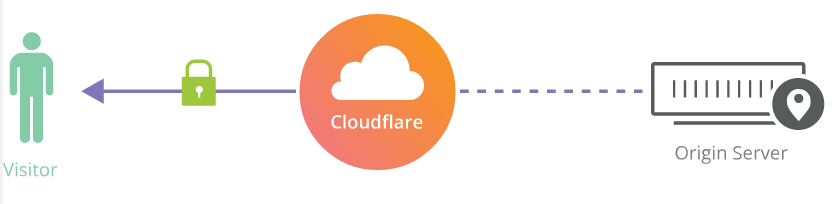
If you don't have an SSL certificate on your origin server, the available free option is Flexible SSL:
Flexible SSL
Flexible SSL encrypts traffic from Cloudflare to end users of your website, but not from Cloudflare to your origin server. This is the easiest way to enable HTTPS because it doesn’t require installing an SSL certificate on your origin. While not as secure as the other options, Flexible SSL does protect your visitors from a large class of threats including public WiFi snooping and ad injection over HTTP.
Enabling it is just one click away:
Of course, if you already have an SSL certificate on your server, go for the Full SSL option!
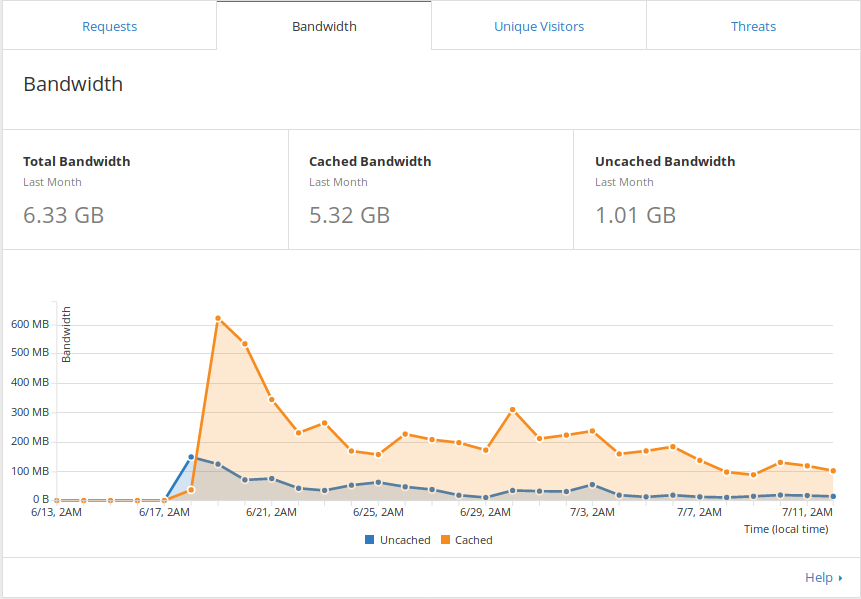
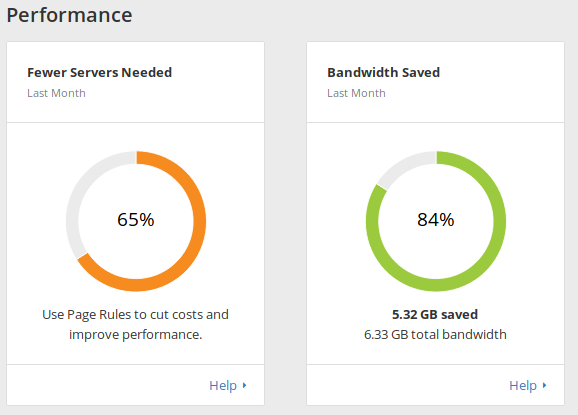
Cached traffic results
We got ourselves a free CDN and a free HTTPS setup without using Heroku paid SSL. I'll pay next to nothing on my next S3 bill :)
As you can see below 84% of the traffic is now cached:
Conclusion
- June 1st-30th AWS bill: $12.32 USD with 51896 pages viewed.
- July 1st-31th AWS bill: $0.20 USD with 3056 pages viewed.
The hosting cost went down from $0.24 USD per 1000 pages viewed to $0.06 per 1000 pages viewed. That's a 75% cost reduction on your hosting bill, for free !
Thanks for reading !
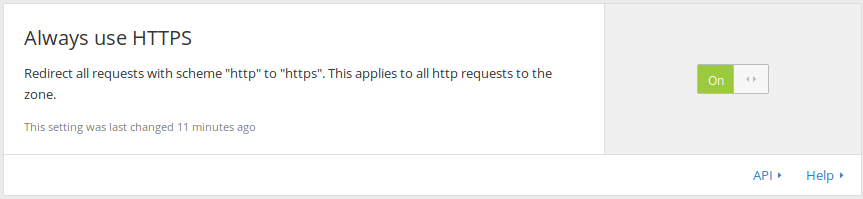
Bonuses:
-
HTTPS everywhere:
Redirect all requests with scheme "http" to "https". This applies to all http requests to the zone.
-
Opportunistic Encryption
Opportunistic Encryption allows browsers to benefit from the improved performance of HTTP/2 and SPDY by letting them know that your site is available over an encrypted connection. Browsers will continue
to show "http" in the address bar, not "https".

-
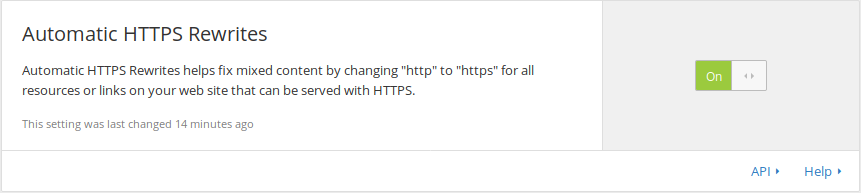
Automatic HTTPS Rewrites
Automatic HTTPS Rewrites helps fix mixed content by changing "http" to "https" for all resources or links on your web site that can be served with HTTPS.